Changing the boot device
The boot device is critical to your Unraid server as it stores the operating system, configuration files, and license. (For typical USB installs this is a USB flash drive; with internal boot it is another device.) If it fails or becomes unreliable, prompt replacement is essential to avoid data loss and minimize downtime.
In Unraid 7.3.0 and later, the WebGUI uses Boot device on the Main tab (for example Boot Device settings and backups). On earlier releases, the same controls are labeled Flash or Flash device. Use whichever label your version shows.
When you replace your Unraid boot device, your license is transferred to the new device, and the old boot device is blacklisted and can no longer be used with Unraid. This action is permanent and cannot be undone.
Some common indicators that your boot device may need to be replaced include:
- The server will not boot, or files are missing from the device.
- The device repeatedly enters read-only mode or shows file system errors.
- The device is lost or stolen.
- Storage capacity is insufficient for updates or configuration changes.
- The physical size of the device does not fit your server setup.
Selecting a replacement device
When choosing new boot media for Unraid, focus on reliability and compatibility over speed.
Requirements
| Requirement | Details |
|---|---|
| USB version | USB 2.0 recommended (typically more reliable and widely compatible than USB 3.0) |
| Unique GUID | Must contain a unique hardware GUID in programmable ROM |
| Minimum size | At least 4 GB |
| Maximum recommended size | 32 GB (for ease of manual installs; larger devices may work but are not necessary) |
| Brand/vendor | Purchase from reputable brands and trusted retailers; avoid second-hand or gray-market |
| Physical size | Choose a form factor that fits your server’s available USB ports and physical constraints |
For detailed guidance on choosing a compatible drive (counterfeits, brand recommendations, and where to buy), see Choosing a boot device.
- Buy USB drives from reputable retailers and avoid auction sites and unknown sellers.
- Avoid second-hand or previously used drives.
- Test the new drive on your server before transferring your license.
Replacing your boot device
Before replacing your current boot device, consider checking it for errors:
- Shut down your server and remove the boot device.
- Insert the device into a Windows or Mac computer.
- Use Windows Scandisk or Mac Disk Utility to check for and repair errors.
- If errors are found and repaired, you may continue using the device. If issues persist or recur, replacement is recommended.
A single power outage or incomplete write can sometimes cause minor corruption, which is usually repairable. However, repeated issues signal the need for a new device.
There are two ways to replace your Unraid boot device: the recommended USB Flash Creator tool for Windows or macOS (for USB boot media), or the manual method for advanced users. Always back up your boot device before starting.
Backing up your boot device
- Using the WebGUI
- Manual copy
In Unraid 7.3.0 and later, the WebGUI uses Boot device on the Main tab (for example Boot Device settings and backups). On earlier releases, the same controls are labeled Flash or Flash device. Use whichever label your version shows.
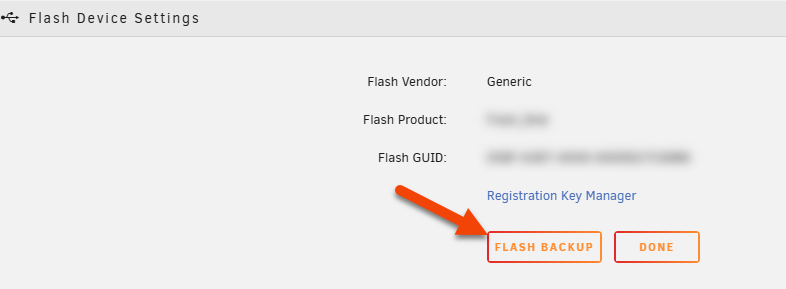
- Go to the Main tab and select your boot device.
- In the Boot Device tab, click Boot Device Backup to download a zipped backup to your computer.
Alternatively, use Unraid Connect automated backup for automated boot-device backups.
- Shut down your server and remove the boot device.
- Insert it into another computer.
- Copy all files from the boot drive to a safe backup location.
- Regularly back up your boot device, especially after major configuration changes.
- Store backups off-server (on another computer or cloud storage).
- Keep a screenshot of your disk assignments after any hardware changes.
If you transfer a trial configuration to a new boot device, you will not be able to start the array until you purchase a valid registration key. Trial keys only work on the original device.
Replacement methods
- Using the USB Flash Creator
- Manual method
Recommended for most users
- Download the USB Flash Creator tool for Windows or macOS.
- Insert your new USB drive (boot media) into your computer.
- In the creator tool, click the Operating System, scroll down to Use custom and browse to your backup ZIP file.
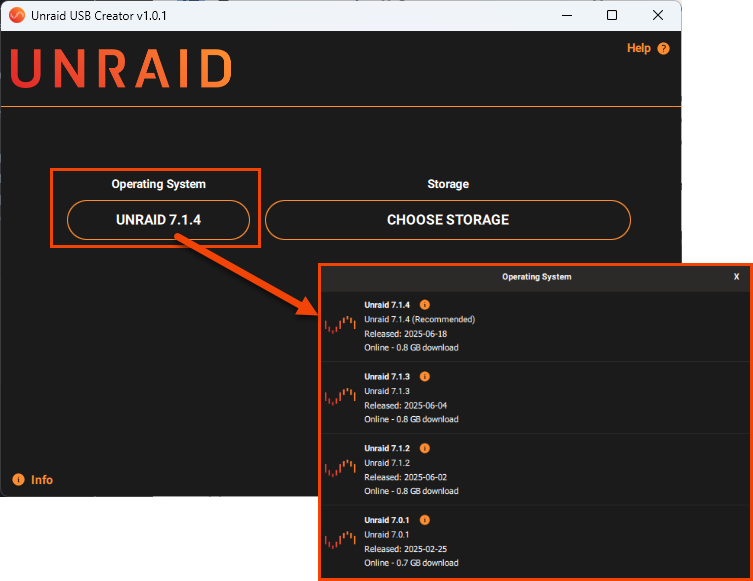
- Choose your new USB drive as the destination and click Write.
- Shut down your server, swap the old boot device for the new one, and power on.
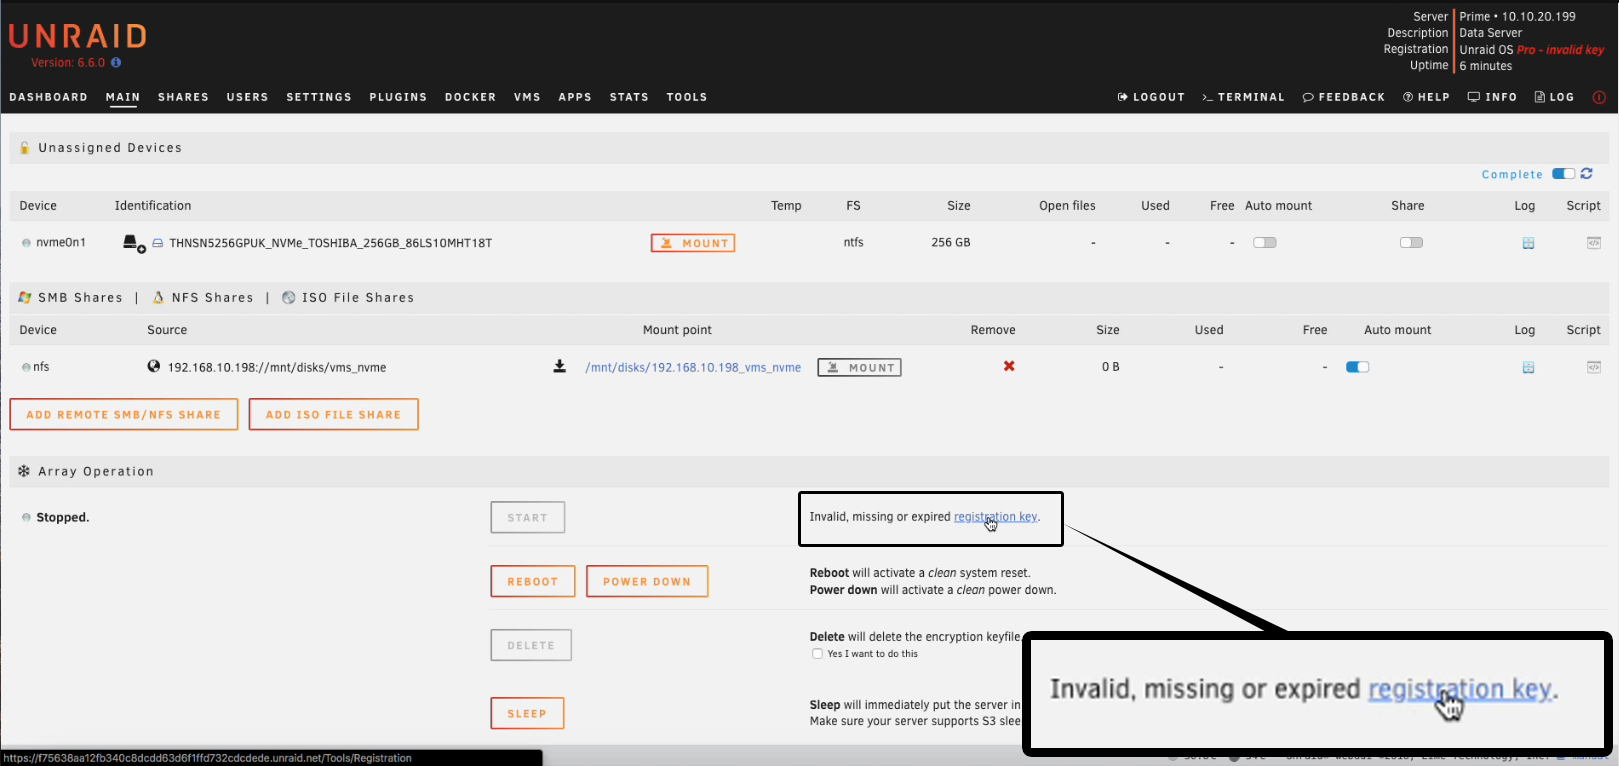
- When prompted with
Invalid, missing or expired registration key, select Registration key.
- If needed, copy your existing license key file into
boot/configon the new device. - Ensure only one key file exists in the config folder.
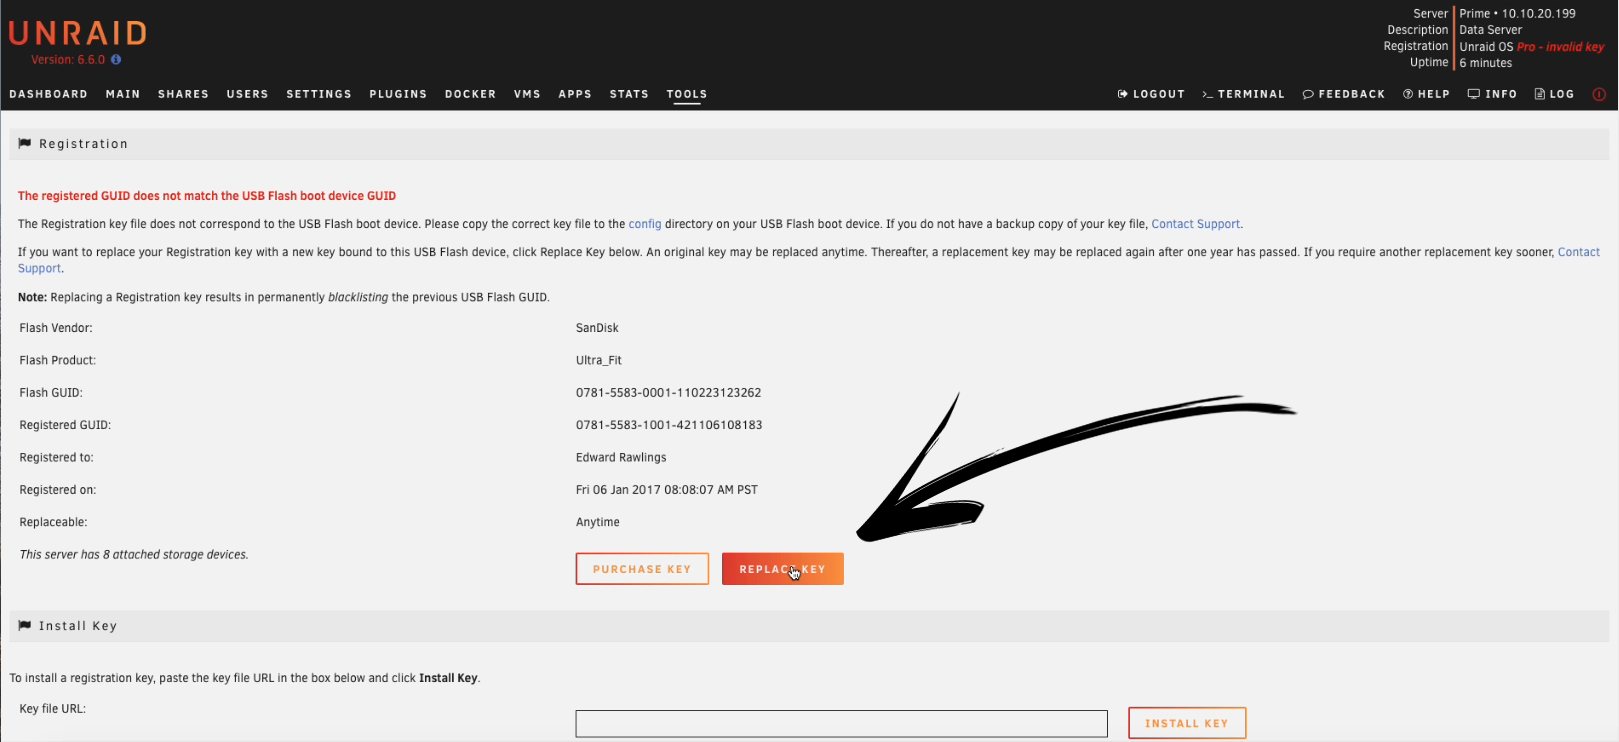
- In Tools → Registration, select Replace key and enter your email address.
- Follow the instructions in the email to install your new key.
- Once complete, select Done.
If you see a "keyfile is not valid" error, your key may be blacklisted or not the last valid key. Contact Unraid support for assistance.
Use this method if the USB Flash Creator tool does not work for your system.
Use the manual method only if you are comfortable with basic file management and your system does not support the USB Flash Creator.
- Prepare new boot media following the Manual install method.
- Copy your backed-up
configfolder to the new boot device, overwriting existing files. - Shut down the server, swap the boot devices, and power on.
- When prompted with
Invalid, missing or expired registration key, select Registration key.
- In Tools → Registration, select Replace key and enter your email address.
- Follow the instructions in the email to install your new key.
- Select Done.
You have now replaced your boot device and transferred your Unraid registration key. The system will display the registration date and the next eligible replacement date.
Registration key replacement frequency
Replacing your Unraid registration key is straightforward, but there are important details about timing and eligibility to keep in mind.
- You can replace your registration key at any time. However, after the first replacement, you must wait 12 months before using the automated online method again.
- If you need to replace your key again within 12 months, contact Unraid support. For faster service, include your old and new USB GUIDs, your license key, and the email address used for purchase.
If you're locked out due to exceeding the automated replacement limit and need immediate server access, set up a new Unraid trial with a new USB drive, then contact support to transfer your license.
Recovering from a failed boot device without a backup
Losing your boot device and not knowing your disk assignments can be stressful, but you can avoid data loss by taking careful steps.
Never assign a data disk as a parity drive. Incorrect assignments can overwrite data with parity information, resulting in permanent data loss.
- Parity drives do not have a mountable file system. If a drive cannot be mounted, it is likely a parity drive.
- Data drives previously used by Unraid retain their data even after resetting the array configuration.
- If you find more unmountable drives than expected parity drives, stop and seek help in the Unraid forums.
To safely reconfigure your array:
- Prepare fresh Unraid boot media, following the instructions provided earlier in this guide.
- Go to the Main tab
- Assign all drives as data drives and start the array.
- Note the serial numbers of drives that do not mount; these are likely your parity drives.
- Do not click Format on any drive. If more unmountable drives appear than expected parity drives, stop and seek help in the forums.
- You can also use the Unassigned Devices plugin to test‑mount each drive (parity will not mount), identifying parity by elimination.
- Stop the array before proceeding.
- Go to Tools → New Config and create a new array configuration, retaining all the currently configured drives.
- Assign the correct drives as parity and the rest as data drives in the Main tab.
- If you have a single parity drive, the order of data drives is not critical. Check Parity is Valid only if you are certain you assigned the same physical parity disk and no writes occurred since the original configuration. For dual parity, both the order of the data drives and the assignment of parity1 and parity2 are important—parity1 and parity2 are not interchangeable, and parity must be rebuilt if either is changed.
- Start the array to commit assignments. Data drives should mount, and their contents should remain intact.
- If you checked Parity is Valid, run a correcting parity check to confirm that your configuration is correct.
After restoring your array, verify any share-specific include/exclude settings, as the order of data drives may have changed.
* "WireGuard" and the "WireGuard" logo are registered trademarks of Jason A. Donenfeld.