Deploy & configure Unraid OS
After booting Unraid OS for the first time, you'll use the WebGUI to complete your system configuration. This interface lets you manage your server, set up storage, configure user shares, and control features like hardware virtualization and Docker containers.
It may be easier for users to follow this guide after configuring their language settings. Check out Multi-language support to make the WebGUI more accessible in your preferred language.
Connect to the Unraid WebGUI
You can connect to the WebGUI in two ways:
- GUI Mode: Boot Unraid in GUI mode and sign in using a keyboard and monitor connected to the server. Use
rootas the username with no initial password. - Web Browser: On another device on your local network, visit
http://tower.local. If you set a different hostname, use that instead oftower(i.e., for the hostnameunraidserver, you'd visithttp://unraidserver.local). mDNS handles the resolution of these.localaddresses.
The Unraid server is accessible on your LAN as soon as it’s fully booted. You can find the IP address on your router’s DHCP client list or by using a network scanning tool.
Set a root password
When you access the WebGUI for the first time, you'll be prompted to create a strong password for the root user.
Make sure your password is:
- Unique
- At least 8 characters long. (Although, best practice recommends 12+ for the most secure passwords!)
- A mix of letters, numbers, and special characters
We recommend using a password manager for secure storage.
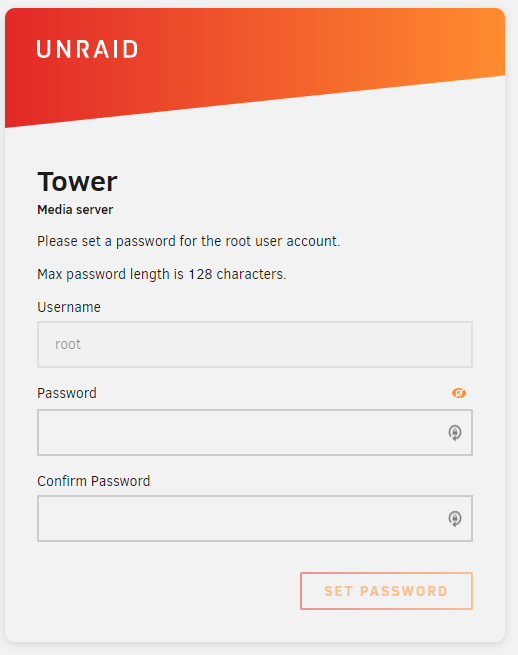
If you forget your root password, you can reset it following the Reset your password guide. You can also update your password in the Users page of the WebGUI.
Onboarding
The onboarding wizard below applies to Unraid 7.3 and later.
-
Press Get Started to launch the onboarding wizard. If you prefer to configure manually, select Skip Setup.
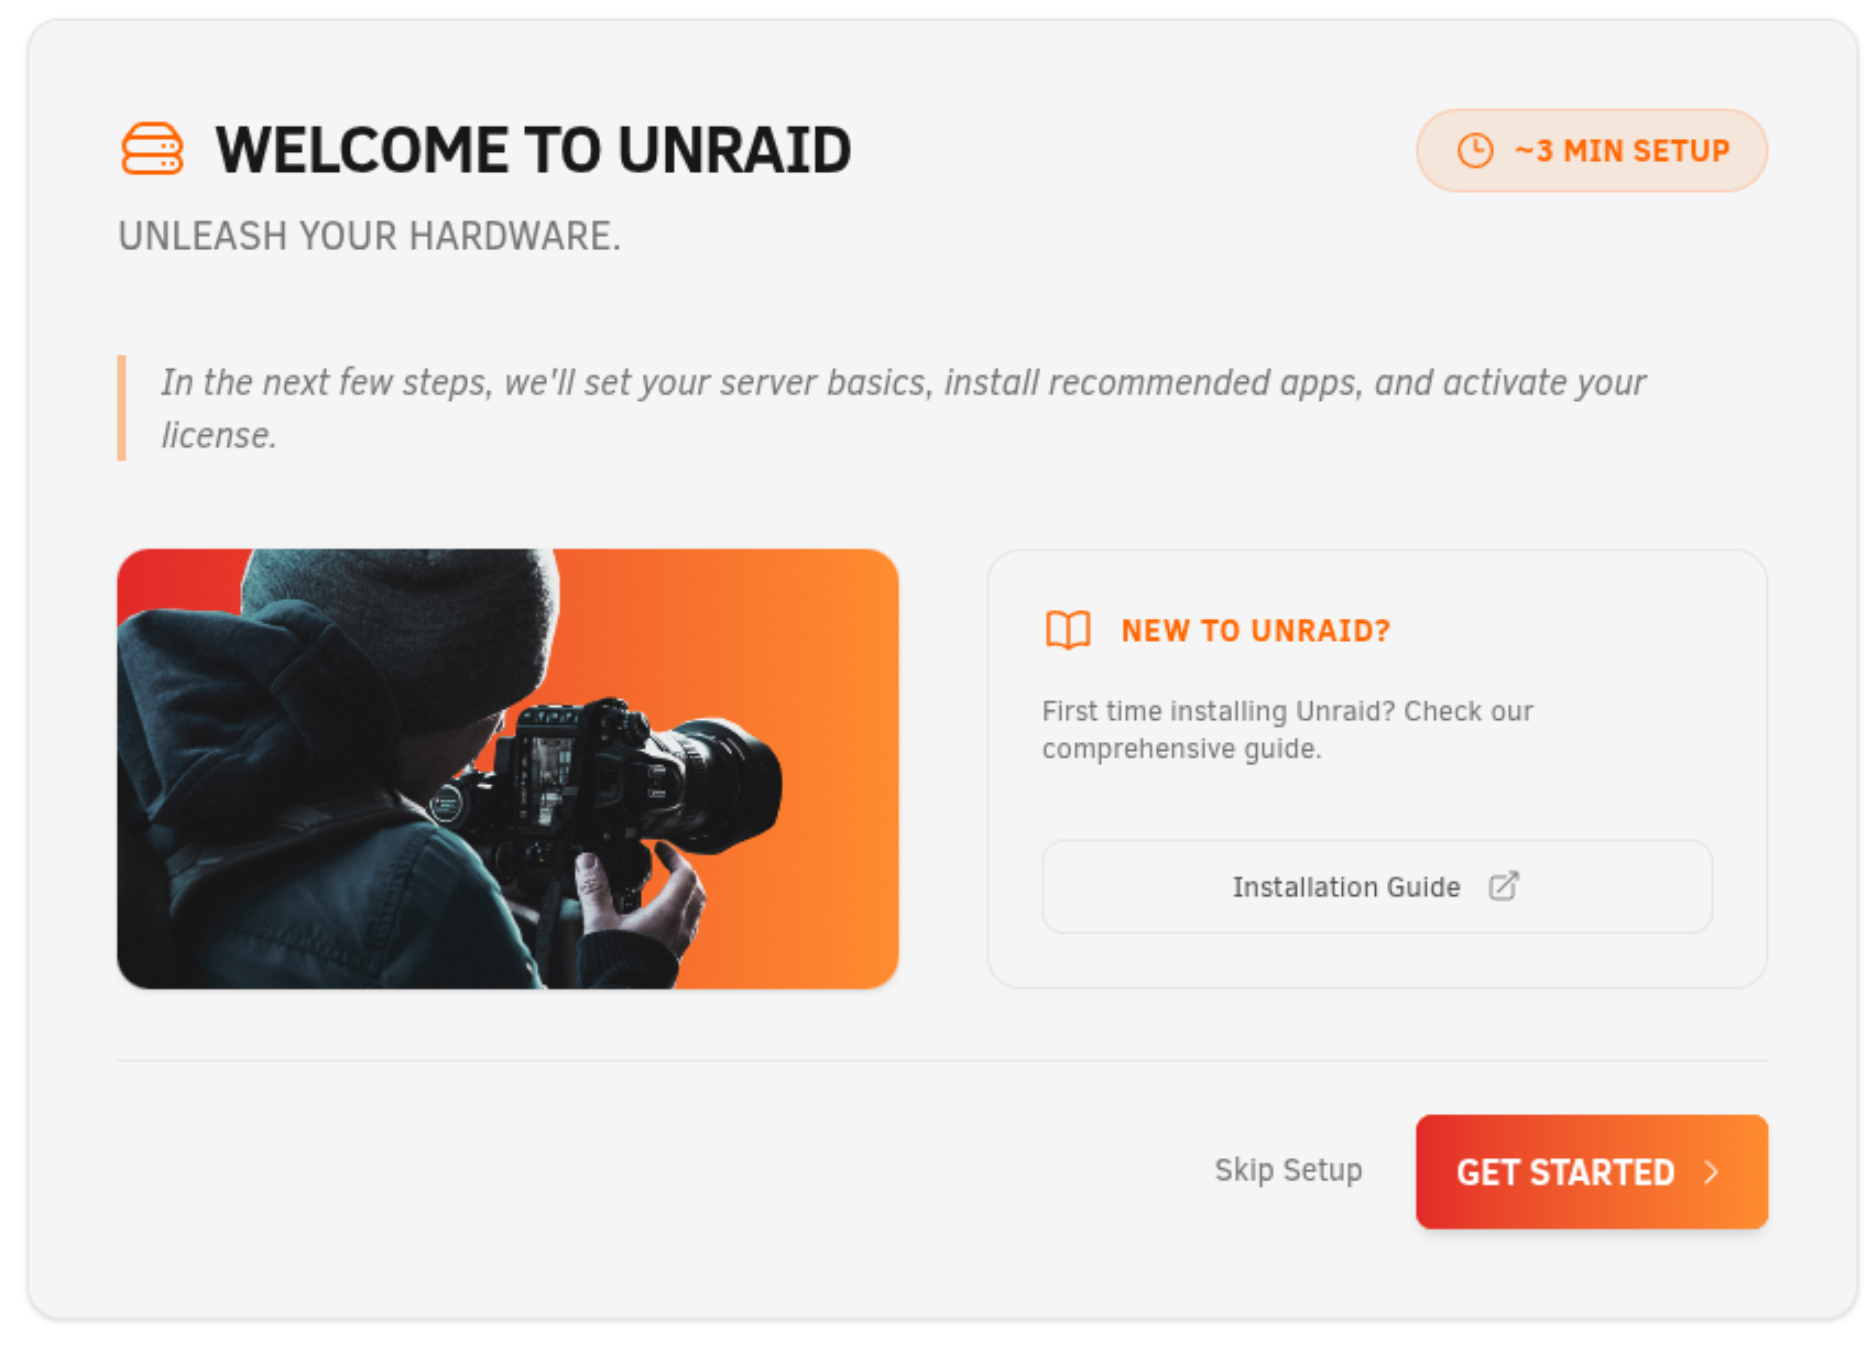
To relaunch the wizard later, go to Settings → Onboarding Wizard.
-
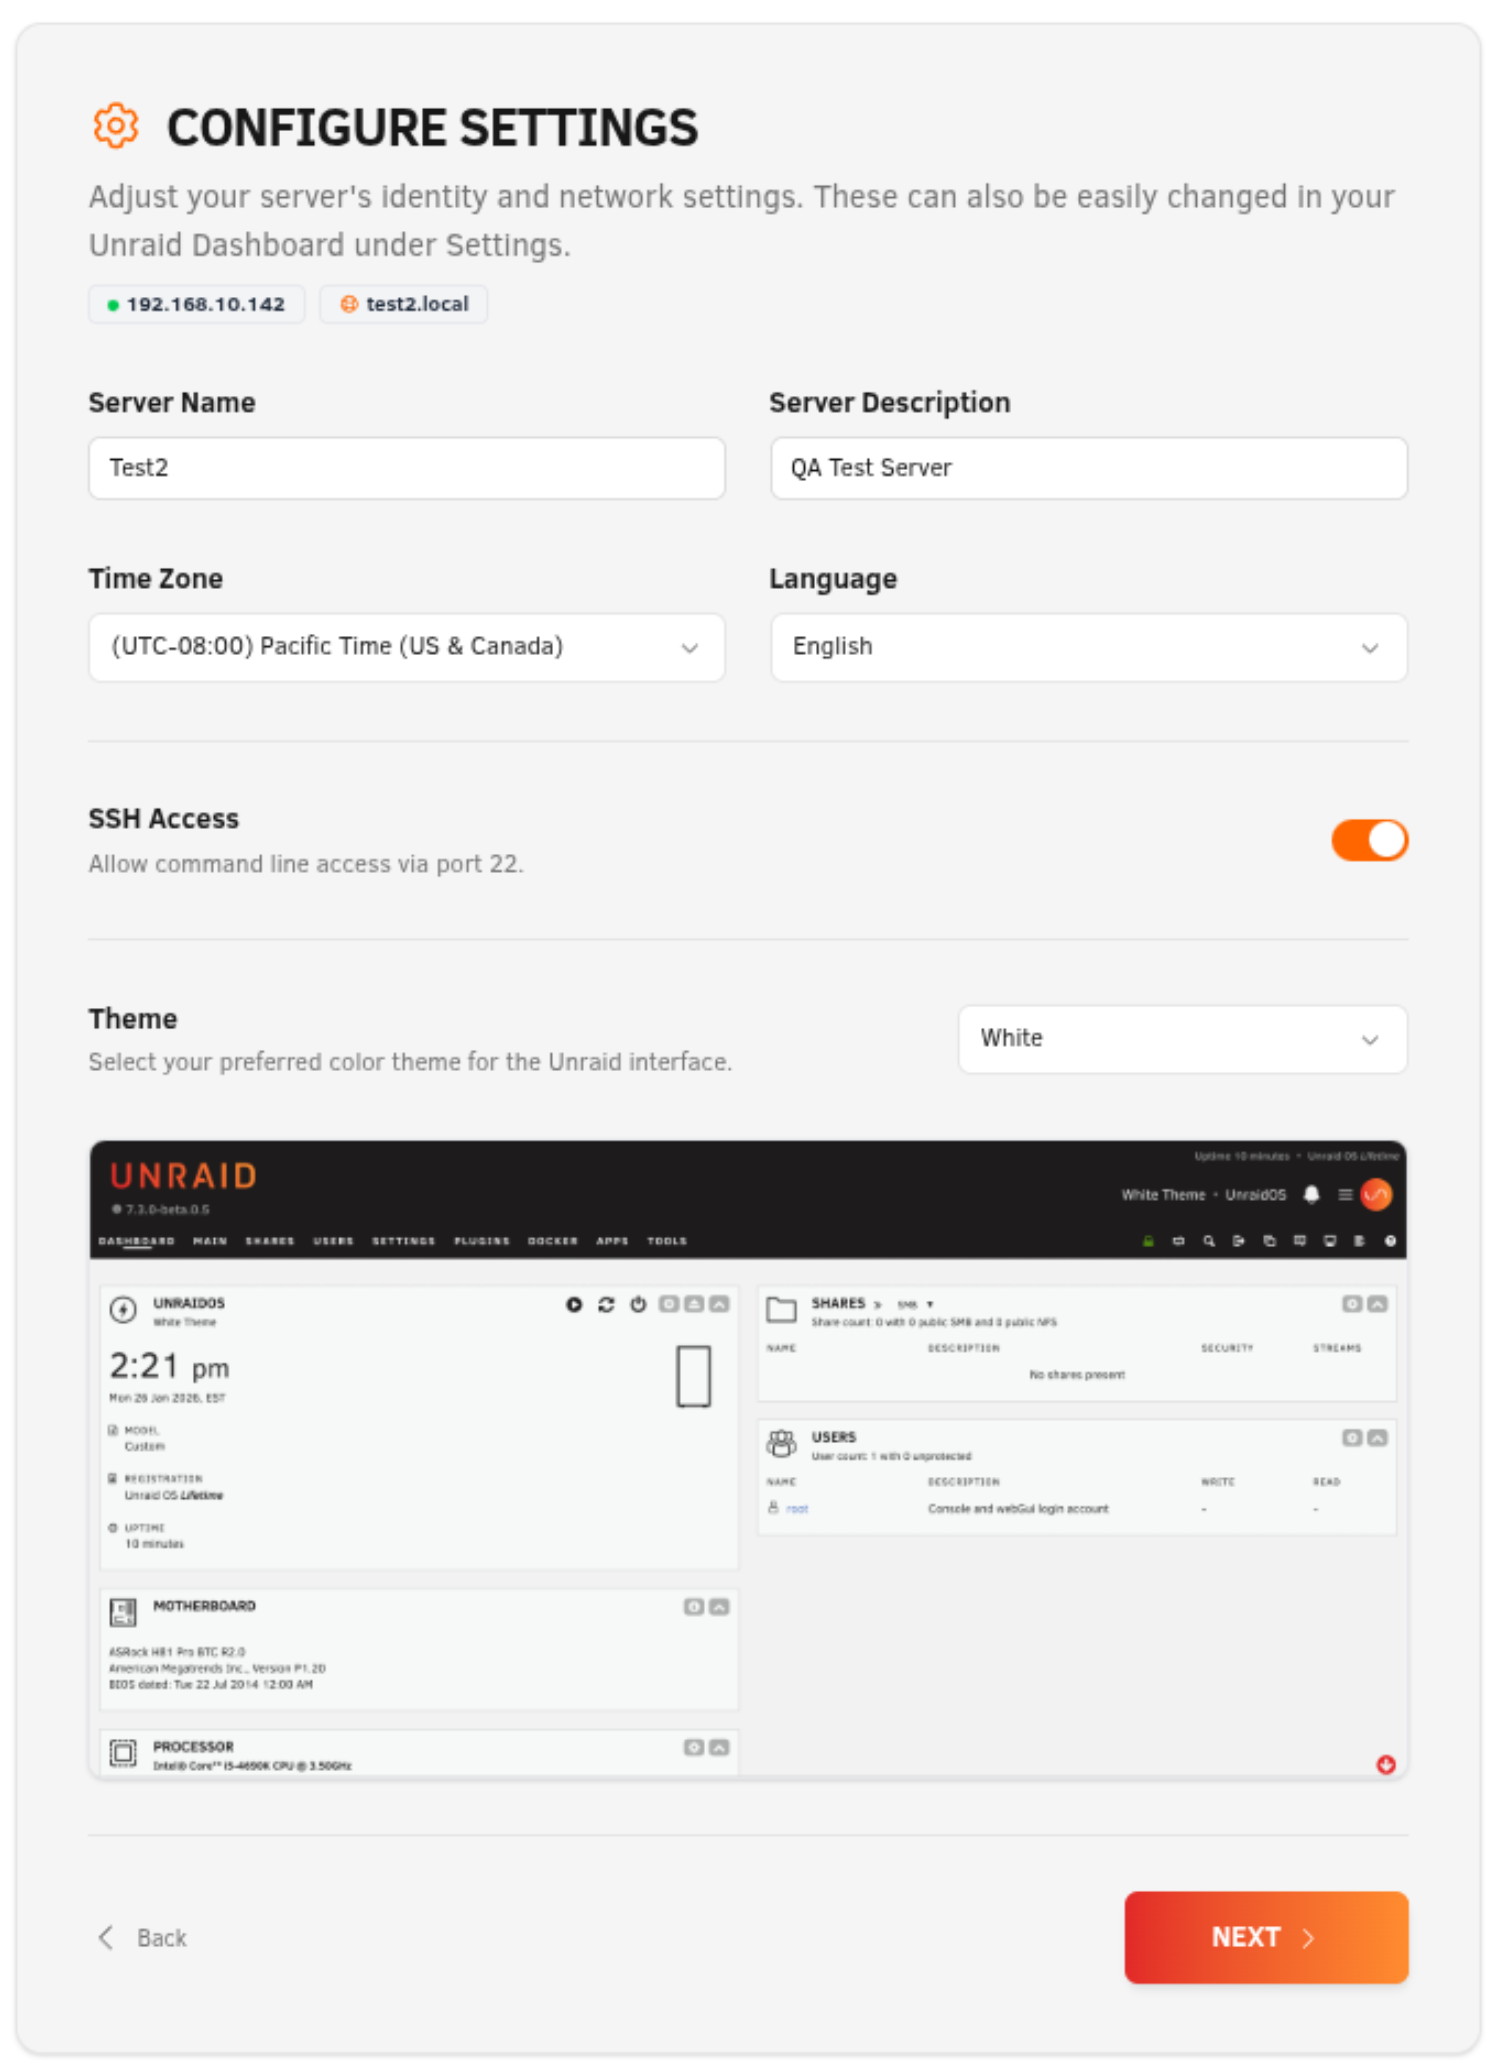
Configure your server settings, including server name and description, time zone, language, and optional SSH and theme preferences. Then click Next.
-
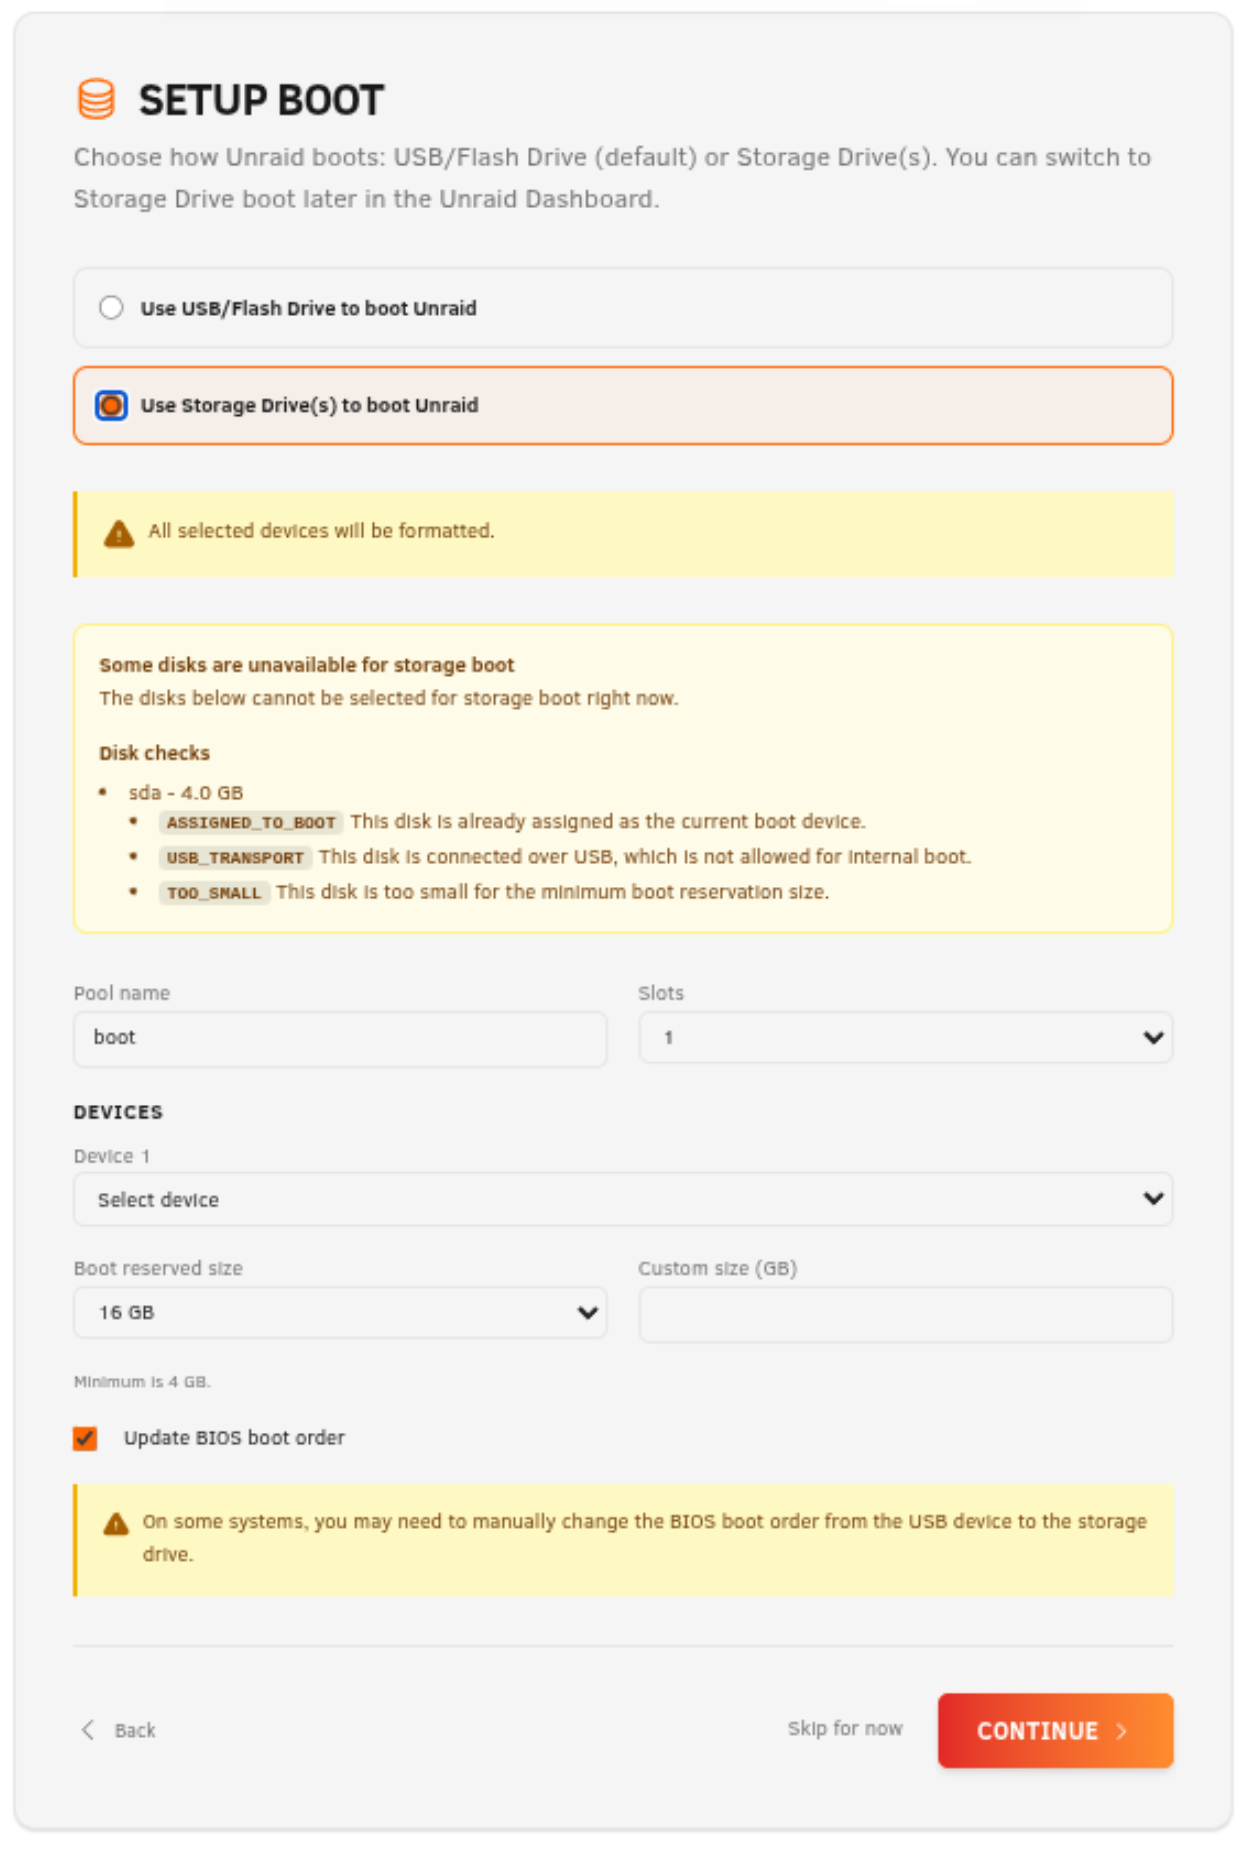
Choose your boot option:
- For flash boot, keep the default USB/flash boot configuration and click Next.
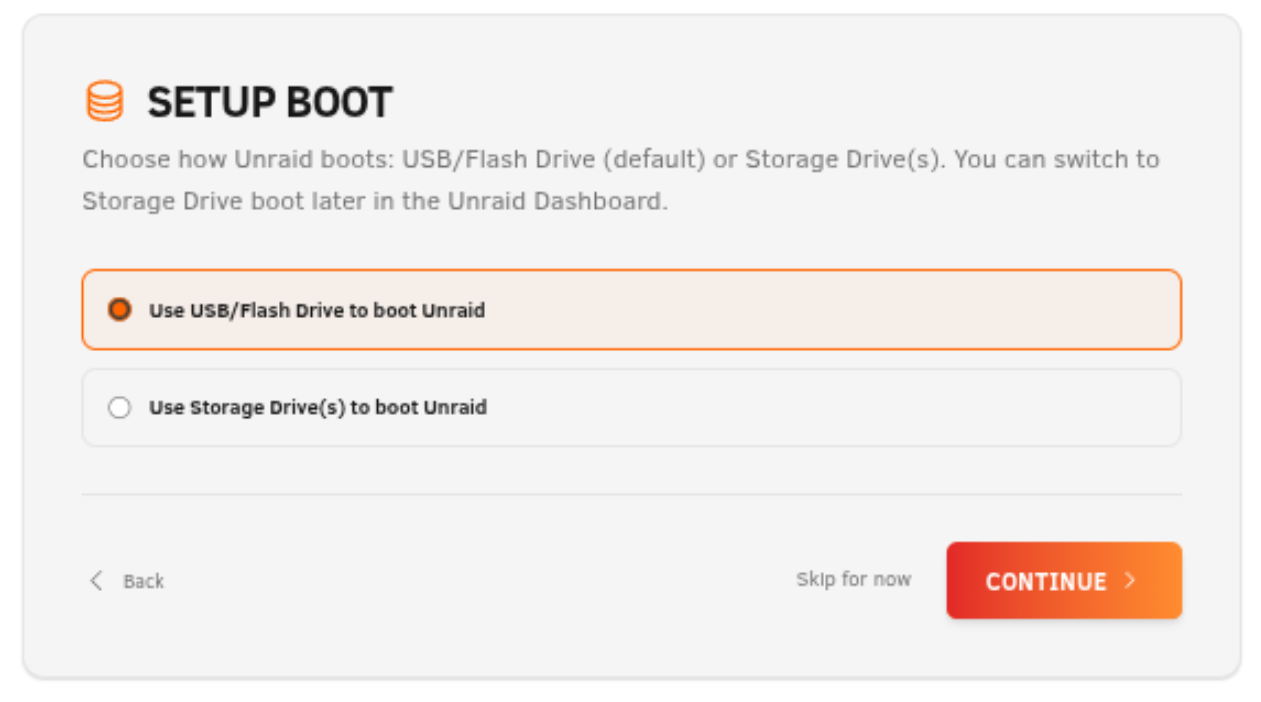
- For internal boot, choose single or mirrored boot mode, select the device(s), and set the space reserved for the boot partition. Then click Next.
If you have questions about device counts or mirrored boot, see the Internal Boot FAQ (7.3+), which also includes video walkthroughs. For TPM-based licensing questions, see the TPM Licensing FAQ (7.3+).
-
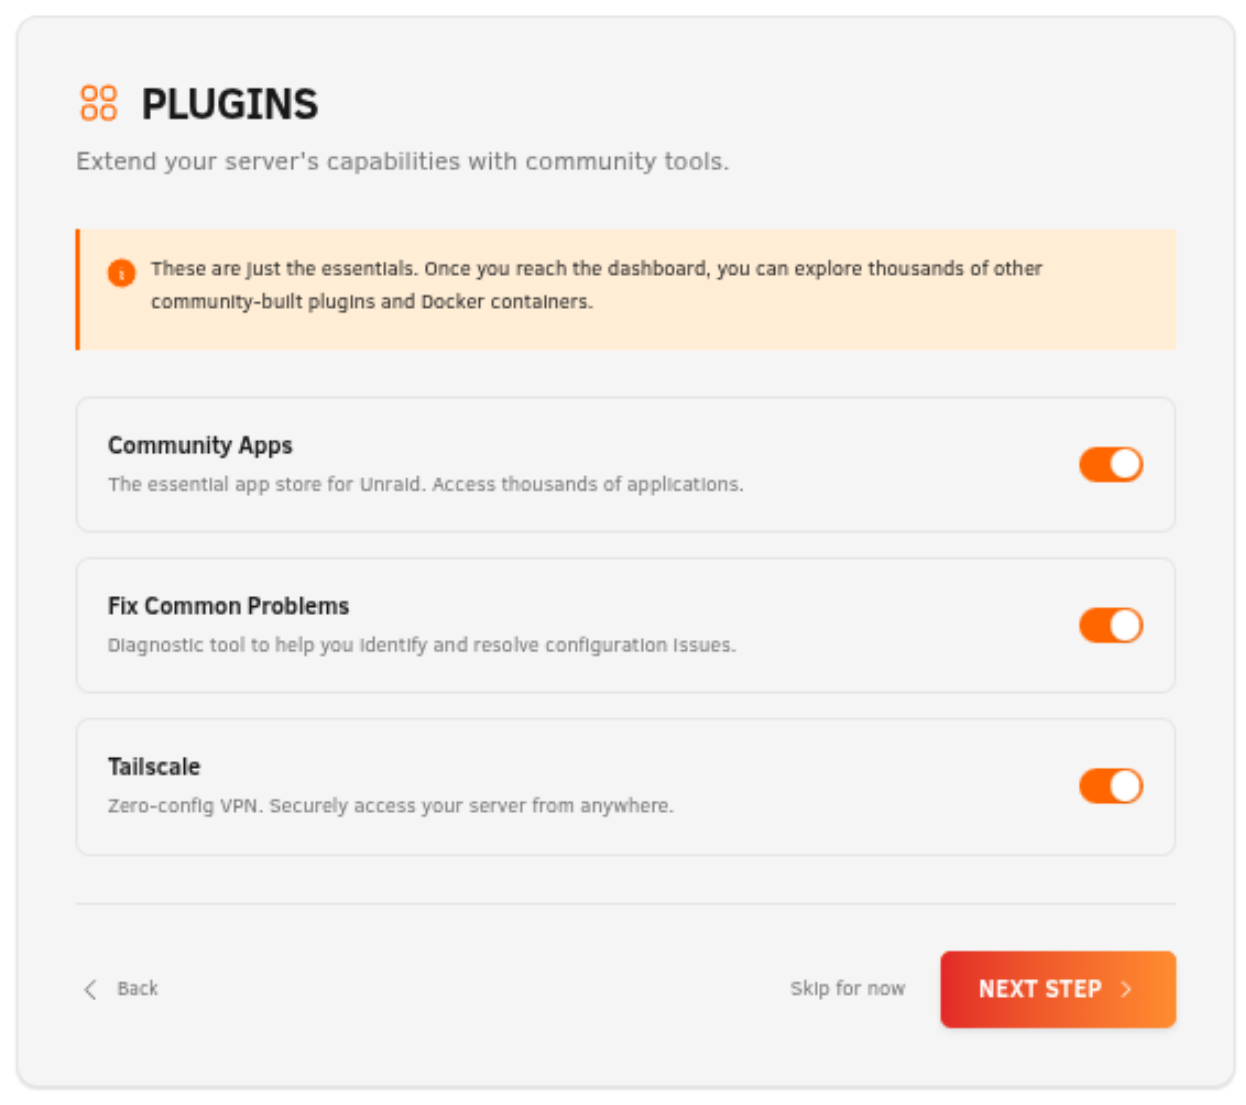
Optionally choose whether to preinstall key plugins, then click Next.
-
Review the summary, then click Confirm & Apply.

-
On the Next Steps screen, review the recommended follow-up actions, then click:
- Go to Dashboard if you chose flash boot
- Reboot if you chose internal boot
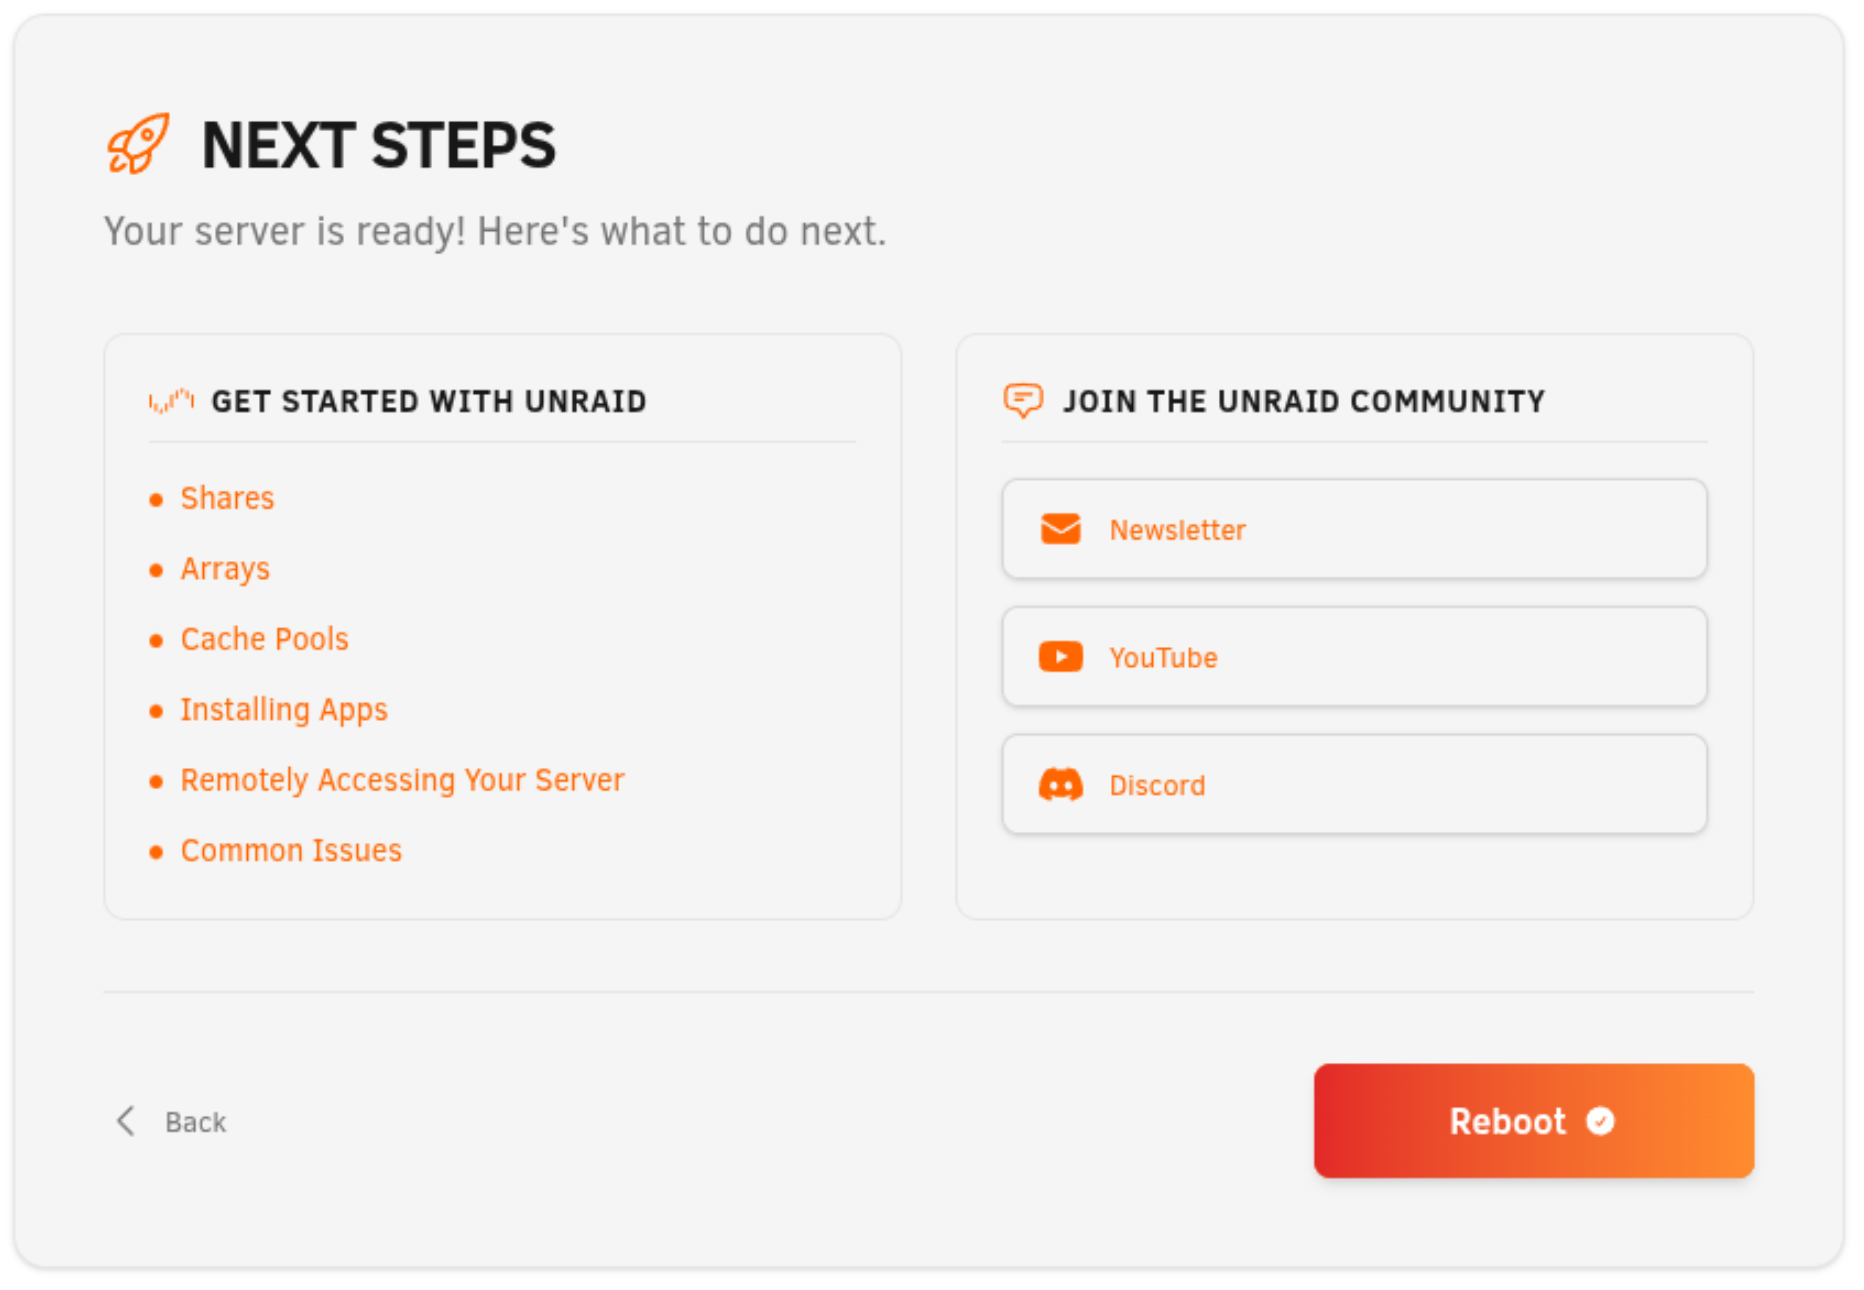
For internal boot questions, see the Internal Boot FAQ (7.3+).
Register your license key
Log in to your Unraid.net account to obtain a license key:
-
In the WebGUI, go to the Get Started section.
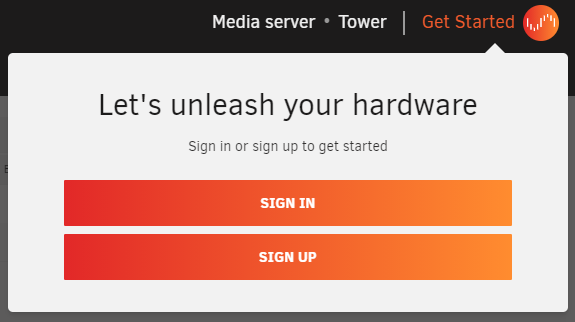
-
Sign in or create an account, after which a trial key will be installed automatically.
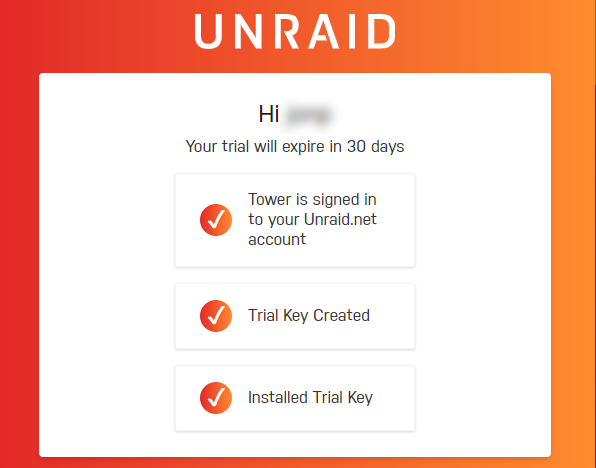
This process allows you to manage your Unraid OS license keys, obtain new keys, recover lost ones, or upgrade your license.
For details on your license, visit Tools → Registration in the WebGUI.
BIOS Recommendations
Before deploying Unraid OS, it's important to verify your system's BIOS and storage controller settings. Below, you can find a checklist to help ensure compatibility, stability, and access to key features.
Click to expand our BIOS and Storage Controller checklist
Proper BIOS and storage controller configuration is vital for a stable Unraid OS deployment. Use this checklist before your first boot.
Basic Settings
✅ Set the USB flash drive as the primary boot device.
✅ Configure the storage controller to AHCI mode with SATA connections.
✅ Set the controller to HBA mode (not RAID).
✅ Disable Secure Boot as it is not supported by Unraid OS.
Advanced Settings
✅ Enable hardware virtualization features (e.g., Intel VT-x or AMD-V) for virtual machines (VMs).
✅ Enable IOMMU support (Intel VT-d or AMD-Vi) for PCI device assignment to VMs.
Troubleshooting Tips
If Unraid OS does not boot, try:
✅ Adjusting the boot order to: Forced-FDD, USB-HDD, USB-ZIP.
✅ Disabling USB 2.0/3.0 support.
✅ Toggling any Fast Boot features.
✅ Toggling USB keyboard support.
For further assistance, visit the Unraid general support forum.
Many motherboards limit boot device selection to 12 hard drives. If your USB flash drive is recognized as a hard drive, you may not be able to boot from it after installing 12 physical hard drives. Configure the BIOS to treat the flash drive as a removable device whenever possible.
If using an add-on HBA, you may be able to disable INT 13h support to prevent its connected drives from appearing in the bootable devices list, helping to stay within the 12-drive limit.