Array-Zustand und -Wartung
Das regelmäßige Überprüfen Ihres Unraid-Arrays ist entscheidend für die Aufrechterhaltung der Datenintegrität und die Identifizierung potenzieller Probleme, bevor sie zu Datenverlust führen. Diese Seite behandelt Überwachungstools und Fehlerbehebungsverfahren für Ihr Array.
Array-Geräte überprüfen
You can initiate a check using the Check button under Array Operations. Depending on your array's configuration, this button allows you to conduct either a parity check or a read check.

For convenience, you can schedule these checks to run automatically at intervals that suit you by navigating to Settings → Scheduler. It's advisable to perform automated, correcting checks on a monthly or quarterly basis to ensure the ongoing health of your data and fix any sync errors found.
Paritätsprüfungen
A parity check is essential when your array includes at least one assigned parity device. During this process, all data disks are read simultaneously. The system recalculates the parity and compares it to the information stored on your parity disk(s).
Im Detail: Paritätssynchronisation vs. Paritätsprüfung - Was ist der Unterschied? - Klicken, um zu erweitern/zusammenzufalten
A parity sync reads all data disks and creates parity from scratch, saving the results on the parity drives. This process typically happens when you add or replace a parity drives or after significant configuration changes.
A parity check reads all data disks along with the parity drives. It recalculates the parity values and compares them to the stored values. There are two modes for running a parity check:
- Korrigierend (CORRECT): Wenn es eine Abweichung findet, aktualisiert es das parity disk und protokolliert das Ereignis.
- Nicht korrigierend (NOCORRECT): Protokolliert nur gefundene Fehler, ohne die Parität zu aktualisieren.
To avoid excessive logging, only the first 100 addresses with errors are reported during a parity check. These mismatches are referred to as sync errors and indicate where the parity does not align with the data, typically due to issues such as sudden power losses or hardware problems. Each sync error is counted in 4KiB blocks - this is the system's I/O unit size (known as the Linux page size).
Im Detail: Was bedeutet "gültig" für Paritäts- und Arrayscheiben? - Klicken, um zu erweitern/zusammenzufalten
A valid parity disk indicates that after the last successful parity sync, Unraid recognized the parity as "good," meaning it's suitable for data recovery if a disk fails. The "valid" status applies to every disk in the array, not just the parity one. If all disks except one are valid, Unraid can reconstruct the missing or failed disk's data using parity.
Unraid maintains the parity disk's "valid" status even when some sync errors occur following a non-correcting check. This ensures that you can still recover a failed disk. If the parity were marked as invalid, you would risk having two invalid disks after just one additional failure, leading to potential data loss.
While a parity check is in progress, you can still use the array. However, be aware that performance may slow down due to drive contention, as both file operations and the check will compete for resources.
Normalerweise wird Unraid die parity disk aktualisieren um mit den errechneten Daten übereinzustimmen und den Sync-Fehlerzähler zu erhöhen, wenn der parity check Fehler identifiziert.
Wenn Sie bevorzugen, eine Prüfung durchzuführen, ohne Korrekturen vorzunehmen, deaktivieren Sie einfach Korrekturen auf Parität schreiben bevor Sie beginnen. Auf diese Weise werden Fehler gemeldet, aber nicht behoben.
After an "Unsafe Shutdown" - when the array is restarted without being properly stopped - Unraid automatically initiates a parity check using the mode configured under Settings → Scheduler → Parity Check (non-correcting by default). To change how the automatic check runs, open Settings → Scheduler → Parity Check and adjust the options there. Unexpected power loss is the most common trigger for an unsafe shutdown, so using an uninterruptible power supply (UPS) is strongly recommended to protect your data.
What to do if you encounter parity errors
Parity errors happen when the parity information your system calculates doesn't match what's stored on your parity drives. This mismatch can arise from several issues, including:
- Untersuchen Sie das Problem: Beginnen Sie mit dem Überprüfen der %%SMART-Berichte|SMART-Reports%%, die detaillierte Informationen über den Gesundheitszustand Ihrer Festplatten bieten. Achten Sie auf Hinweise auf Festplatten- oder Verbindungsprobleme.
- Hilfe in unseren Foren suchen: Wenn Sie das Problem nicht selbst lösen können, ziehen Sie in Betracht, Rat in den Unraid-Foren einzuholen. Die Community kann wertvolle Einblicke und Vorschläge basierend auf ihren Erfahrungen bieten.
- Führen Sie eine weitere Prüfung durch: Nachdem Sie Hardwareprobleme behoben haben, ist es eine gute Idee, eine weitere parity check durchzuführen, um sicherzustellen, dass alles wieder in Ordnung ist.
- Unsaubere Shutdowns oder unerwartete Systemabstürze
Unsaubere Shutdowns oder unerwartete Systemabstürze können ebenfalls ein Hinweis auf solche Fehler sein. When parity errors occur, either the parity drives or the data disks could be out of sync. Ideally, a parity check should report zero errors so everything functions correctly.
What to do if you encounter parity errors
Wenn Ihr parity check Fehler aufdeckt:
- Untersuchen Sie das Problem: Beginnen Sie mit dem Überprüfen der %%SMART-Berichte|SMART-Reports%%, die detaillierte Informationen über den Gesundheitszustand Ihrer Festplatten bieten. Achten Sie auf Hinweise auf Festplatten- oder Verbindungsprobleme.
- Hilfe in unseren Foren suchen: Wenn Sie das Problem nicht selbst lösen können, ziehen Sie in Betracht, Rat in den Unraid-Foren einzuholen. Die Community kann wertvolle Einblicke und Vorschläge basierend auf ihren Erfahrungen bieten.
- Führen Sie eine weitere Prüfung durch: Nachdem Sie Hardwareprobleme behoben haben, ist es eine gute Idee, eine weitere parity check durchzuführen, um sicherzustellen, dass alles wieder in Ordnung ist.
Remember that parity checks can take several hours, depending on the size of your disks and the activity level of your system. For the best results, schedule these checks during times of low system usage.
Lesekontrollen
Eine Lesekontrolle ist eine wichtige Aufgabe, die unter bestimmten Bedingungen durchgeführt werden sollte, um die Gesundheit Ihres Speicherarrays sicherzustellen. Diese Überprüfung ist notwendig, wenn Ihrem Array keine Paritätsgeräte zugewiesen sind oder wenn Sie mehr deaktivierte Laufwerke als verfügbare Paritätslaufwerke haben.
Während einer Lesekontrolle wird jeder Sektor jeder Festplatte im Array untersucht. Ziel ist es, zu überprüfen, ob auf alle Daten zugegriffen werden kann und ob es nicht wiederherstellbare Lesefehler gibt.

Warum Leseprüfungen wichtig sind
Lesekontrollen sind unerlässlich, um die Gesundheit Ihrer Festplatten zu überwachen, insbesondere in Konfigurationen ohne Paritätsschutz. Wenn eine Festplatte während der Überprüfung auf einen nicht wiederherstellbaren Lesefehler stößt, können die betroffenen Daten nicht wiederhergestellt werden, was zu Datenverlust führen könnte. Daher ist es von entscheidender Bedeutung, die Ergebnisse dieser Prüfungen im Auge zu behalten und rechtzeitig zu reagieren, wenn Fehler gemeldet werden.
Sie können auch die Historie von read check-Operationen in der Unraid-Oberfläche überprüfen, was Ihnen dabei hilft, Trends oder wiederkehrende Probleme im Laufe der Zeit zu erkennen.
Wann man eine Leseprüfung durchführen sollte
Erwägen Sie einen read check in den folgenden Situationen durchzuführen:
- Keine Paritätsgeräte zugeordnet: Wenn Ihr Array keinen Paritätsschutz bietet.
- Überprüfung der Laufwerksintegrität: Um die Integrität jedes Laufwerks zu bestätigen, ohne Korrekturen vorzunehmen.
- Nach Beseitigung von Hardwareproblemen: Nachdem Hardwareprobleme behoben wurden, um sicherzustellen, dass alle Laufwerke gesund sind.
Was zu tun ist, wenn Fehler gefunden werden
Wenn Ihre read check Fehler meldet, sind hier einige Schritte, die Sie befolgen sollten:
- Überprüfen Sie die SMART-Berichte:: Überprüfen Sie die SMART-Berichte der betroffenen Laufwerke, um den Gesundheitszustand zu verstehen.
- Verbindungen prüfen: Stellen Sie sicher, dass physische Verbindungen und Kabel sicher sind.
- Erwägen Sie den Austausch: Wenn ein Laufwerk kontinuierlich Fehler zeigt, denken Sie über einen Austausch nach.
- Sichern Sie kritische Daten: Verschieben Sie wichtige Daten so schnell wie möglich von Datenträgern, die Fehler melden, um Datenverluste zu vermeiden.
Ohne Paritätsschutz führt jeder nicht wiederherstellbare Lesefehler zu dauerhaftem Datenverlust für die betroffenen Dateien oder Sektoren.
Um die Gesundheit Ihrer Festplatten zu erhalten, ist es ratsam, regelmäßige Leseprüfungen zu planen, insbesondere wenn Ihr Array keinen Paritätsschutz hat. Diese proaktive Maßnahme hilft Ihnen, potenzielle Probleme frühzeitig zu erkennen und Ihre Daten zu schützen.
Verlauf prüfen
Whenever the system performs a parity check or a read check, it keeps a record of what happened. You can view these details easily by clicking the History button found under Array Operations in the interface.
For those who want to dive deeper, all these records are saved in a text file located in the config directory on your Unraid boot device.
Laufwerke herunter oder hoch drehen
Unraid allows you to control the power states of your hard drives. You can easily spin them up or down, and manage SSDs to be active or in standby. This helps save energy, extend the life of your drives, and reduce noise when the disks are not being used.
Warum runter- oder hochdrehen?
Das Herunterfahren von Laufwerken, die nicht oft verwendet werden, spart Energie und verlängert ihre Lebensdauer. Das frühzeitige Hochfahren von Festplatten reduziert Wartezeiten, wenn Sie Dateien schnell benötigen.
Wie man Drehzustände kontrolliert
Steuern Sie den Spin-Zustand der Festplatten über die Registerkarte Haupt:
- Gehen Sie zur Registerkarte Haupt und suchen Sie Ihre Array-Geräte.
- Jede Festplatte zeigt Schaltflächen zur Steuerung des Zugriffs an:
- 🔘 Schaltfläche - Hochfahren (Falls aktuell heruntergefahren)
- 🟢 Schaltfläche - Herunterfahren (Falls aktuell hochgefahren)
- Klicken Sie auf die entsprechende Schaltfläche für die gewünschte Aktion.
Denken Sie daran, dass eine Festplatte, die gerade zugegriffen wird (z. B. wenn Sie eine Datei öffnen), aktiv bleibt und eine Runterdreh-Anfrage ignoriert.
Wenn eine Festplatte heruntergefahren ist, wird ihre Temperatur in der WebGUI nicht angezeigt. Sobald jedoch eine Anwendung oder ein Benutzer darauf zugreift, wird sie automatisch hochgefahren.
Um den Schreibmodus zu ändern:
Array-Konfiguration zurücksetzen
Das Zurücksetzen Ihrer Array-Konfiguration ist ein wichtiger Schritt, der sorgfältig durchgeführt werden sollte. Dieser Prozess ist normalerweise erforderlich, wenn eine Festplatte entfernt, ein neues Array-Layout erstellt oder Festplattenzuweisungsprobleme behoben werden. Beachten Sie bitte, dass diese Aktion den Datenschutz und die Parität beeinflussen kann. Gehen Sie daher nur dann vor, wenn es wirklich nötig ist.
Setzen Sie Ihr Array zurück, wenn:
- Laufwerke entfernt oder ersetzt werden
- Ein neues Array-Layout wird gestartet
- Fehler bei der Laufwerkszuordnung behoben werden
- Konfigurationsprobleme behoben werden
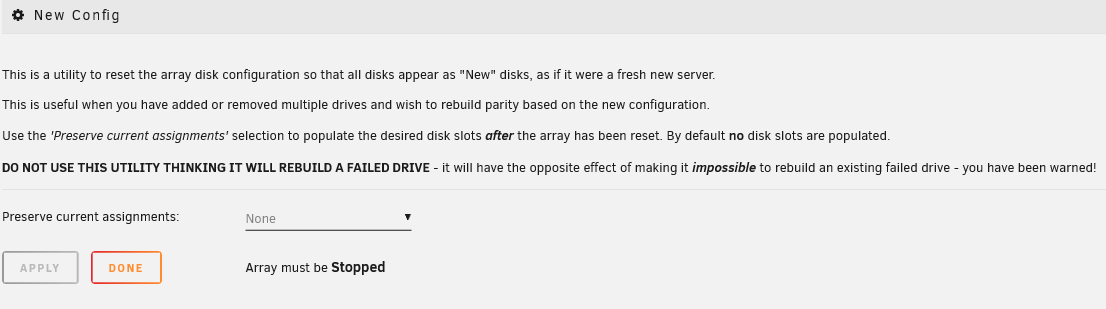
Um Ihre Array-Konfiguration zurückzusetzen:
- Gehen Sie zu Werkzeuge → Neue Konfiguration.
- Behalten Sie optional einige bestehende Laufwerkszuweisungen für geringfügige Anpassungen bei.
- Überprüfen Sie das Bestätigungsfeld und klicken Sie auf Übernehmen.
- Zurück zur Registerkarte Haupt.
- Weisen Sie nach Bedarf Laufwerke zu oder entziehen Sie sie.
- Starten Sie das Array im Normal- oder Wartungsmodus.
- Unraid versucht, zuvor verwendete Laufwerke zu erkennen und Daten, wenn möglich, zu erhalten.
- Das Entfernen eines Datenlaufwerks macht die Parität ungültig, es sei denn, das Laufwerk wurde vor dem Entfernen auf Null gesetzt.
- Das Ändern der Reihenfolge der Laufwerke beeinflusst Parität1 nicht, kann jedoch Parität2 ungültig machen.
Wenn Sie die Start-Schaltfläche sehen, gibt es ein Kontrollkästchen mit der Aufschrift Parität ist gültig. Markieren Sie dieses Kontrollkästchen nur, wenn Sie sich sicher sind, dass es korrekt ist, oder wenn ein erfahrener Unraid-Benutzer Ihnen dies während der Wiederherstellung empfohlen hat. Ein fehlerhaftes Markieren dieser Option kann zu Datenverlust führen.
Cache-Pools in Unraid bieten erhebliche Vorteile, insbesondere für schreibintensive Aufgaben, virtuelle Maschinen (VMs) und Docker-Container. Diese Pools arbeiten separat vom Hauptarray und können mit mehreren Laufwerken entweder mit dem BTRFS oder ZFS Dateisystem eingerichtet werden, wobei verschiedene RAID Konfigurationen zur Geschwindigkeits- und Datensicherheit unterstützt werden.
Rückgängigmachen eines Resets
Um einen Reset rückgängig zu machen:
- Access your boot device over the network (SMB).
- Öffnen Sie den
config-Ordner. - Benennen Sie
super.oldinsuper.datum. - Starten Sie Ihren Server neu, um die vorherige Konfiguration wiederherzustellen.
Statusberichte
Unraid bietet Statusberichte, die Ihnen helfen, den Zustand Ihres Speichera arrays im Blick zu behalten. Diese Berichte sind eine schnelle Möglichkeit, zu überprüfen, ob einer Ihrer Datenträger deaktiviert ist oder Probleme mit dem Lesen oder Schreiben von Daten hat.
-
Aktueller Status: Statusberichte zeigen den aktuellen Zustand Ihres Arrays an. Es ist wichtig zu beachten, dass diese Informationen nach einem Neustart Ihres Systems zurückgesetzt werden. Sie speichern also keine Historie vergangener Probleme.
-
Keine historischen Daten: Wenn Sie sehen möchten, was vor einem Neustart passiert ist, müssen Sie an anderer Stelle nachsehen, da diese Berichte keine vergangenen Zustände speichern.
Denken Sie daran, dass die Statusberichte keine SMART Daten enthalten. SMART-Berichte geben Ihnen eine detailliertere Ansicht des Gesundheitszustands einzelner Festplatten. Auch wenn Ihr Statusbericht zeigt, dass alles in Ordnung ist, ist es dennoch ratsam, die SMART-Berichte regelmäßig zu überprüfen, um potenzielle Probleme frühzeitig zu erkennen.
Fehlerbehebung bei Array-Startproblemen
If your array won't start, follow these steps to identify and fix common problems. Look for error messages under Main → Array Operation.
Fehlende Festplatten
Nachricht:
Zu viele falsche und/oder fehlende Festplatten!

With one parity drive, you can only have one missing disk. With two parity drives, two disks can be missing and you can still start the array, and so on. Parity helps until you can replace the missing disk.
Was zu tun ist: Ersetzen Sie die fehlende Festplatte. Bei Konfigurationen mit doppelter Parität ersetzen Sie die fehlenden Festplatten nacheinander. Wenn Sie die Daten nicht wiederherstellen können (oder wenn in einer doppelten Paritätskonfiguration mehr als 2 Festplatten ausfallen), gehen Sie zu Tools → Neues Konfig, um das Neue Konfig-Verfahren durchzuführen.
Gerätebegrenzung
Nachricht:
Zu viele angeschlossene Geräte. Bitte ziehen Sie in Betracht, Ihren Registrierungsschlüssel zu aktualisieren.

Die Regeln für die Verbindung von Speicher gelten nur, bevor der Array gestartet wird. Nach dem Start des Arrays können Sie mehr Speicher hinzufügen, einschließlich USB-Laufwerken für virtuelle Maschinen. Seien Sie jedoch darauf aufmerksam, dass Unraid derzeit die Anzahl der angeschlossenen Speichergeräte auf die Starter-Lizenzstufe (6 Geräte-Grenze) beschränkt.
Um diesen Fehler zu beheben:
Um diesen Fehler zu beheben:
- Stoppen Sie die Array.
- Entfernen Sie alle unnötigen Speichergeräte.
- Starten Sie das Array.
- Anschließend Geräte für die Verwendung mit Unzugewiesene Geräte wieder anschließen.
Lizenzprobleme
Nachricht:
Ungültiger oder fehlender Registrierungsschlüssel.

Ein gültiger Registrierungsschlüssel ist erforderlich, um das Array zu starten. Um einen zu kaufen oder einen Testschlüssel zu erhalten:
- Gehen Sie zu Werkzeuge → Registrierung.
- Klicken Sie auf Testschlüssel erhalten oder Kauf-Schlüssel.
- Den Schlüssel installieren, indem Sie zu Registrierung zurückkehren, ihn in das Feld einfügen und auf die Schaltfläche Schlüssel installieren klicken.
- Testlizenz: Volle Unraid-Zugriff für 30 Tage, genau wie die höheren Lizenzstufen. Sie können unbegrenzt viele Speichergeräte verwenden, aber Sie benötigen eine Internetverbindung, um den Start zu initiieren. Starten Sie hier eine neue Testphase.
- Bezahlte Lizenz: Diese gehört für immer Ihnen! Es gibt jedoch Einschränkungen hinsichtlich der Anzahl der Geräte, die je nach gewähltem Plan (Starter, Unleashed oder Lifetime) variieren. Nach der Aktivierung müssen Sie keine Internetverbindung mehr herstellen.
:::
Wenn Sie einen "ungültigen Schlüssel"-Fehler sehen, könnte das bedeuten, dass Ihre Testversion abgelaufen ist. Um Unraid weiter zu verwenden, können Sie hier eine Lizenz erwerben.
Wenn Ihr Server online ist und Ihre Testversion noch nicht abgelaufen ist, hat Ihr USB-Flash-Laufwerk möglicherweise eine GUID, mit der kein Schlüssel registriert werden kann. Dies kann passieren, wenn die GUID nicht eindeutig ist oder bereits von jemand anderem registriert wurde (häufig bei Fälschungen oder einigen bekannten Marken). Die Verwendung eines SD-Kartenlesers über USB kann dieses Problem ebenfalls verursachen, da dieser oft eine generische GUID hat. Wenn Ihr USB-Flash-Laufwerk auf der Blacklist steht, kann es nicht mehr verwendet werden. Siehe Erstellen Ihres bootfähigen Mediums und Auswählen eines Ersatzgeräts für Hinweise zur Auswahl eines kompatiblen Startgeräts.
Schlüsselserververbindung
Nachricht:
Kann keinen Kontakt zum Key-Server herstellen
Wenn Sie eine Testlizenz haben, wird eine Nachricht angezeigt, die darauf hinweist, dass Sie den Unraid-Lizenzserver kontaktieren müssen, um Ihr Array zu starten. Wenn Sie jedoch eine bezahlte Lizenz haben, können Sie das Array ohne zusätzliche Schritte starten.
Für Testbenutzer versucht Ihr Server beim ersten Start eine Verbindung zum Lizenz-Servers herzustellen, um Ihre Lizenz zu überprüfen. Wenn er innerhalb von 30 Sekunden keine Verbindung herstellen kann, wird das Array nicht gestartet. Aber keine Sorge! Jedes Mal, wenn Sie das WebGUI aktualisieren oder darin navigieren, wird erneut versucht, Ihre Lizenz schnell zu validieren. Sobald die Validierung erfolgreich ist, muss Ihr Server nicht erneut überprüfen, es sei denn, Sie starten ihn neu.
Zurückgezogene Freigabe
Nachricht: Diese Unraid-Version wurde zurückgezogen.
Wenn Sie diese Meldung sehen, bedeutet das, dass Sie eine Beta- oder Release-Kandidatversion von Unraid verwenden, die nicht für den regelmäßigen Gebrauch freigegeben ist.
Um dies zu beheben:
- Öffnen Sie Unraid.
- Gehen Sie zu Tools → OS aktualisieren.
- Installieren Sie die neueste stabile Version.
Sobald die Aktualisierung abgeschlossen ist, starten Sie Ihren Server neu, um ihr Array zu starten.
Festplattenausfall während eines Wiederaufbaus
Wenn während des Wiederaufbaus einer Festplatte eine zweite Festplatte ausfällt, hängt das weitere Vorgehen von Ihrer Paritätskonfiguration ab.
Einzelne Paritätsfestplatte
Wenn während des Wiederaufbaus einer anderen Festplatte eine Festplatte ausfällt, wird der Wiederaufbau gestoppt, da die Daten nicht genau wiederhergestellt werden können. Leider können Sie Ihre Daten in dieser Situation nicht wiederherstellen.
Doppelte Paritätsfestplatte
Wenn Sie zwei parity drives haben, haben Sie mehr Möglichkeiten:
- Sie können warten, bis der erste Neuaufbau abgeschlossen ist, und sich dann mit der zweiten fehlgeschlagenen Festplatte befassen.
- Oder Sie können den aktuellen Wiederaufbau stoppen, die zweite ausgefallene Festplatte ersetzen und dann das Array starten, um beide Festplatten gleichzeitig wieder aufzubauen.
Wenn der erste Wiederaufbau fast abgeschlossen ist, ist es normalerweise besser, ihn fertigstellen zu lassen. Wenn er gerade erst begonnen hat, könnte es schneller sein, beide zusammen wiederherzustellen.
Der Wiederaufbau von Festplatten belastet alle Laufwerke stark, was die Chance auf neue Ausfälle erhöht. Überprüfen Sie immer die Laufwerkgesundheit mithilfe der SMART-Berichte, bevor Sie mit einem Wiederaufbau beginnen.
Seien Sie darauf vorbereitet, dass der Wiederherstellungsprozess mehrere Stunden dauern kann. Die Dauer kann je nach Festplattengröße und Systemauslastung variieren. Größere Festplatten und ausgelastete Systeme benötigen möglicherweise länger.